


Everyone can now start minting and redeeming FTestXRP on the Coston testnet.
The open beta for FAssets began on 4 June, initially focusing on onboarding agents to support the system. While we wait for the launch of the full FAssets dashboard, which is in the final stages of development and audit, this simple demo dapp will allow anyone to experiment with the basic functions of the system.
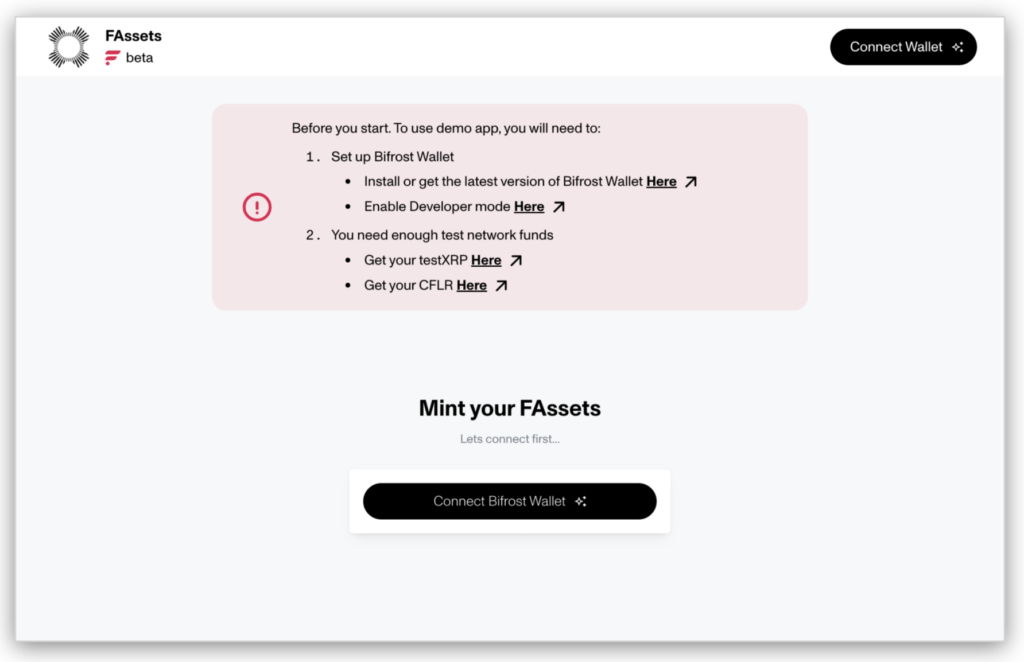
Link: https://coston-fasset-mint-demo.flare.rocks/
To simplify the experience, the dapp has been designed to work with Bifrost Wallet, which is able to connect to both the XRP testnet and Coston simultaneously. This means you do not need to jump between wallets to sign transactions on different networks while moving through the minting and redeeming processes.
Step by step instructions
- Create a Bifrost Wallet if you do not have one already. As with all self-custody wallets, please ensure you store your seed phrase somewhere very safe. Read this summary for more information on securing your Flare experience.
- Make sure you have upgraded to the latest version of Bifrost Wallet. The best experience is with version 0.6.18, which is is in the process of being rolled out on Android and iOS. Please update as soon as it is available in your area.
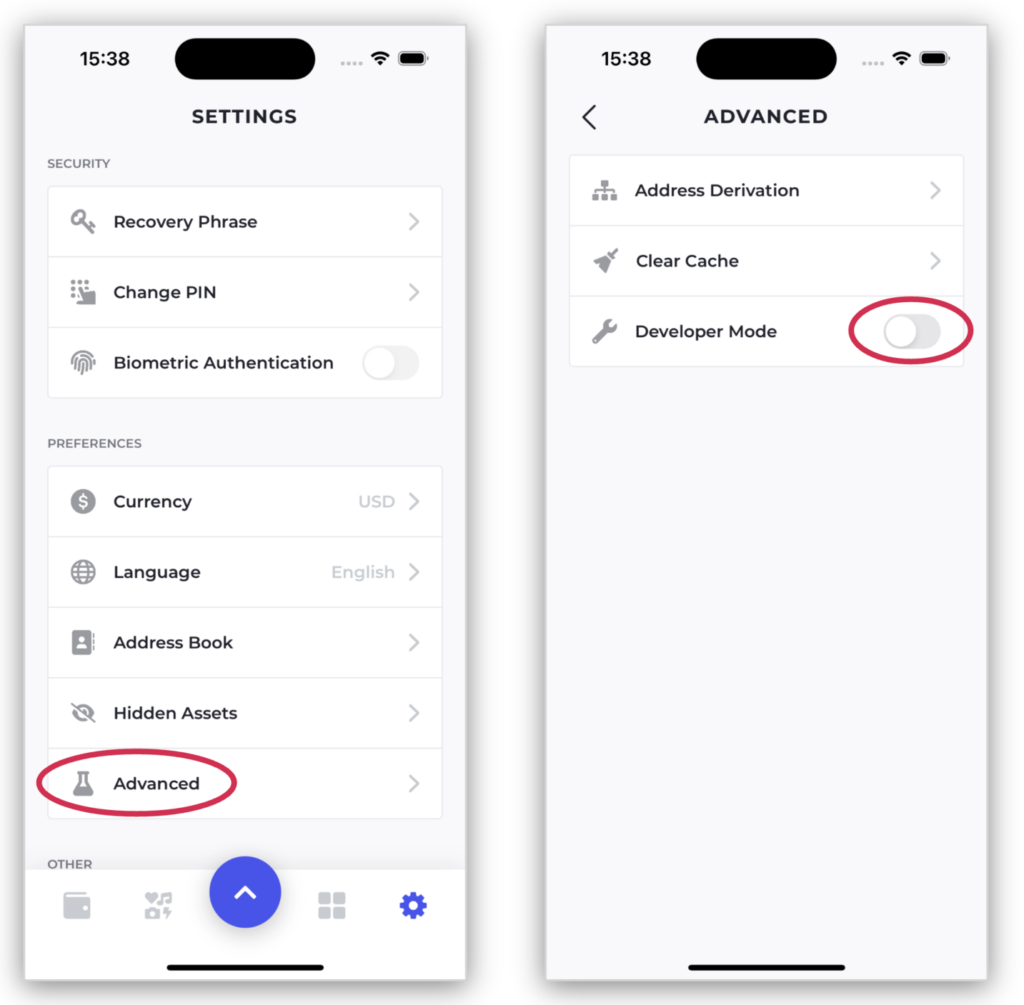
- In order to access test networks in Bifrost Wallet, you will need to activate ‘Developer Mode’. Head to settings by pressing the cog button in the bottom navigation bar, then press ‘Advanced’ and the ‘Developer Mode’ toggle.
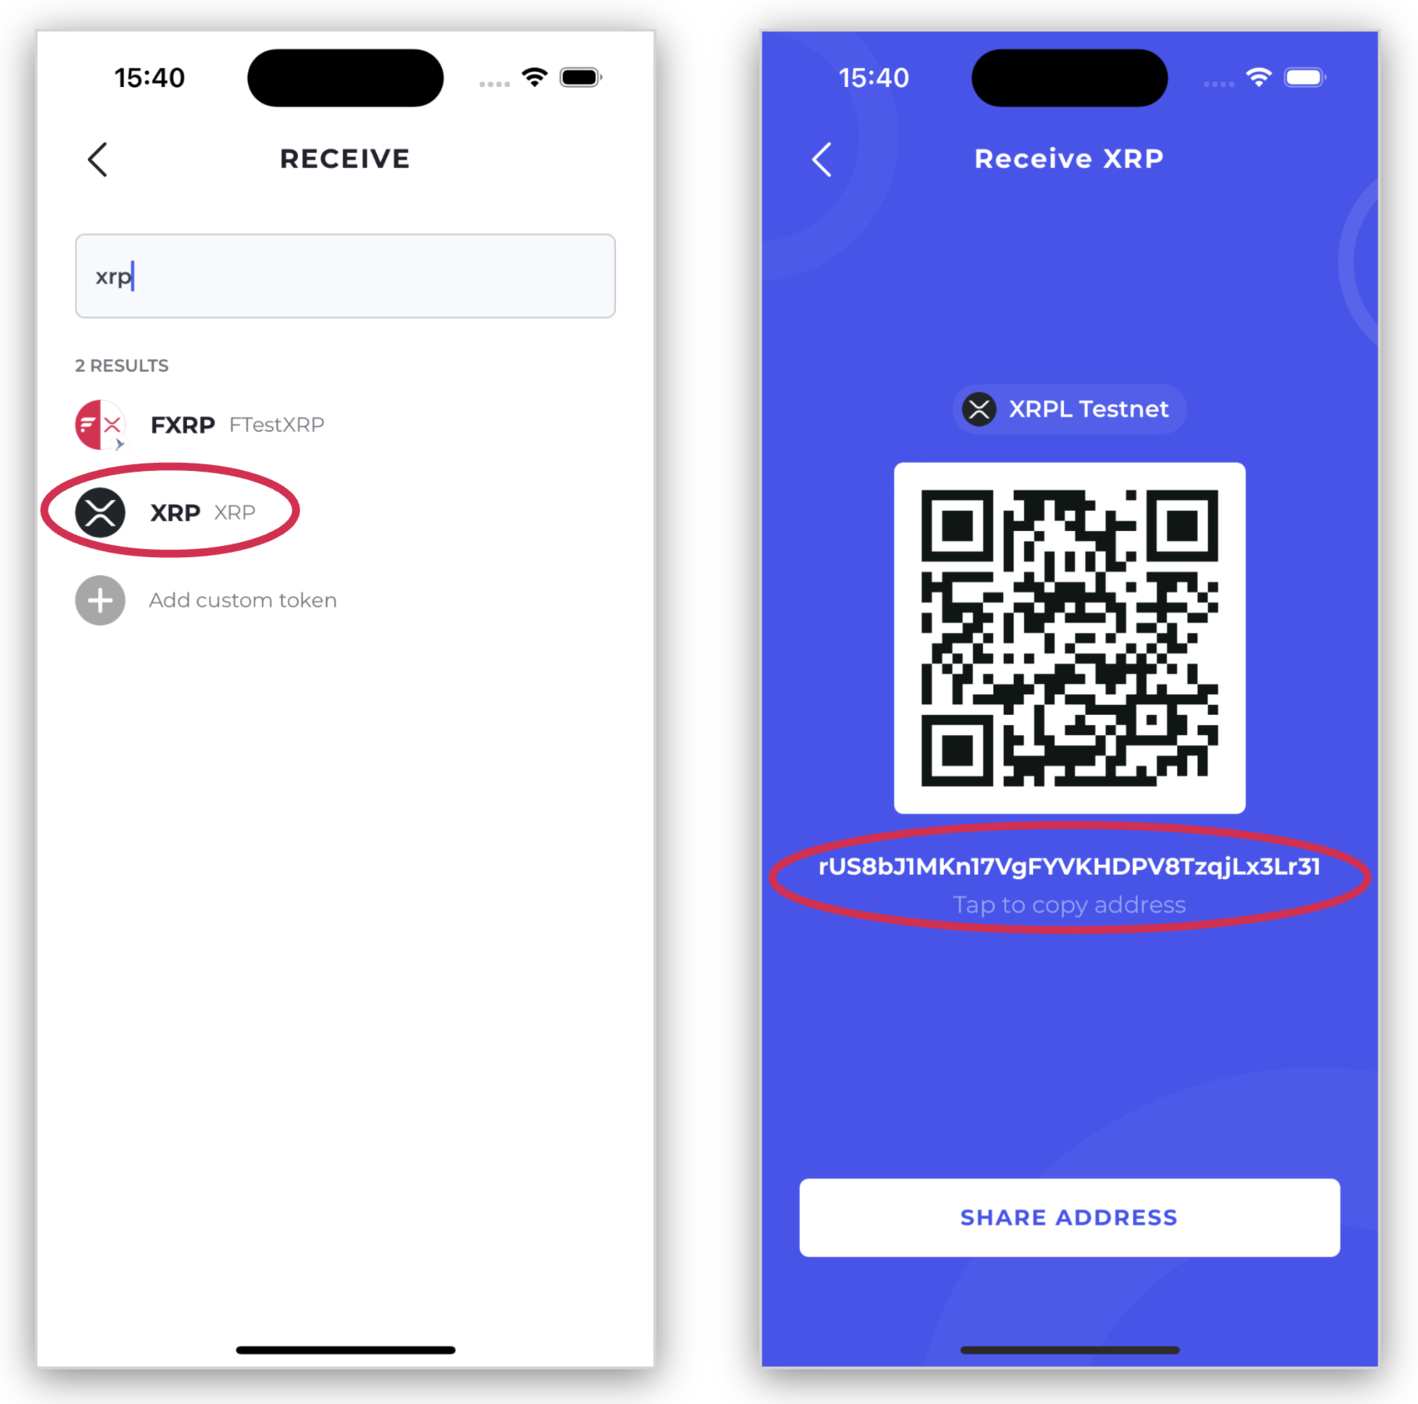
- The next step is to obtain testXRP and Coston Flare from their respective faucets. To do that you will need to know your address for each asset within your Bifrost Wallet. Press the back arrow to get back to the main settings page, then the blue arrow pointing upwards in the middle of the navigation bar. Then press ‘Receive’.

- Let’s start with testXRP. Search for and select ‘XRP’ in the list. Then tap the string of letters and numbers below the QR code to copy your XRP address. Save it somewhere you can get easy access for the next step.
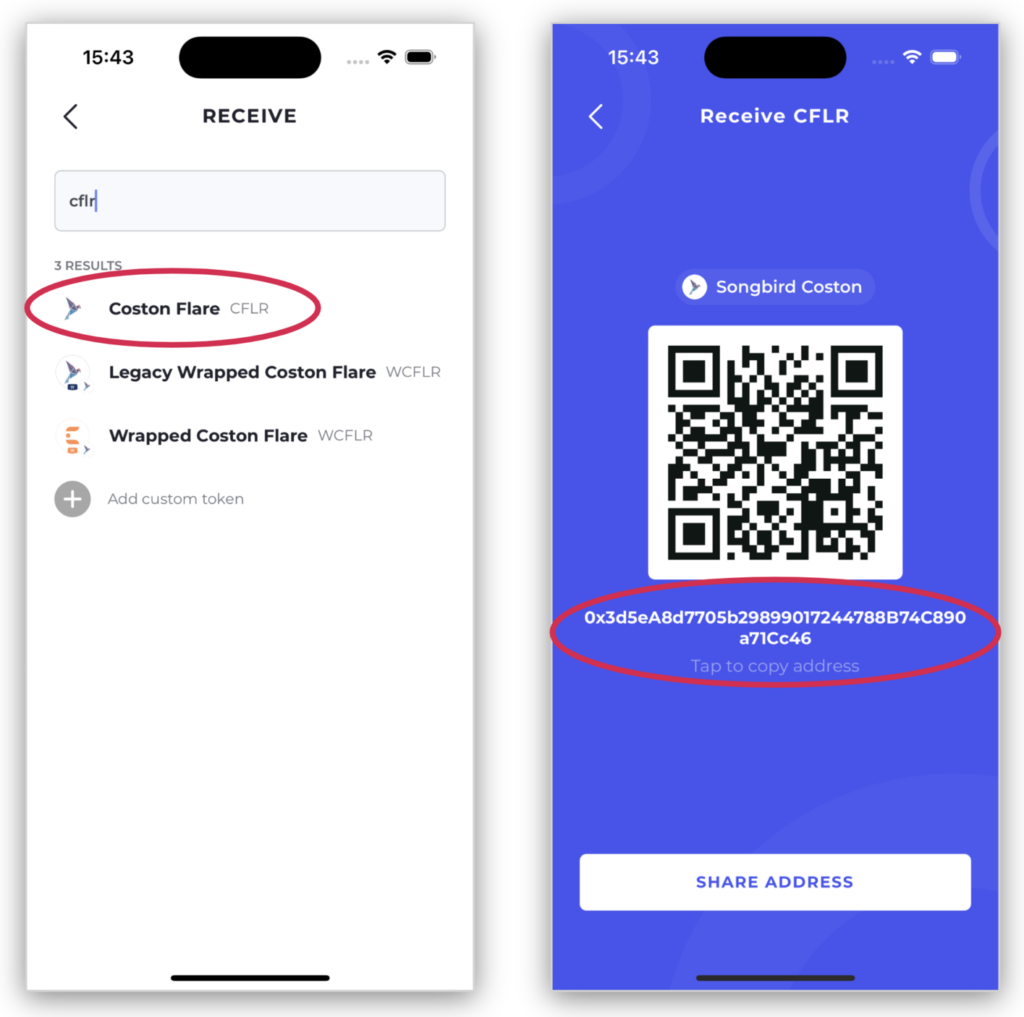
- Now let’s collect your Coston address. Press the back arrow at the top left to return to the ‘RECEIVE’ menu, then select Coston Flare (CFLR). Please do not select Coston 2 Flare (C2FLR), since this is a token on a different network. Coston is the test network for Songbird, and Coston 2 is the test network for Flare. This dapp has been created on Coston as we prepare for launch on Songbird. As before, click the address below the QR code and save it somewhere handy.
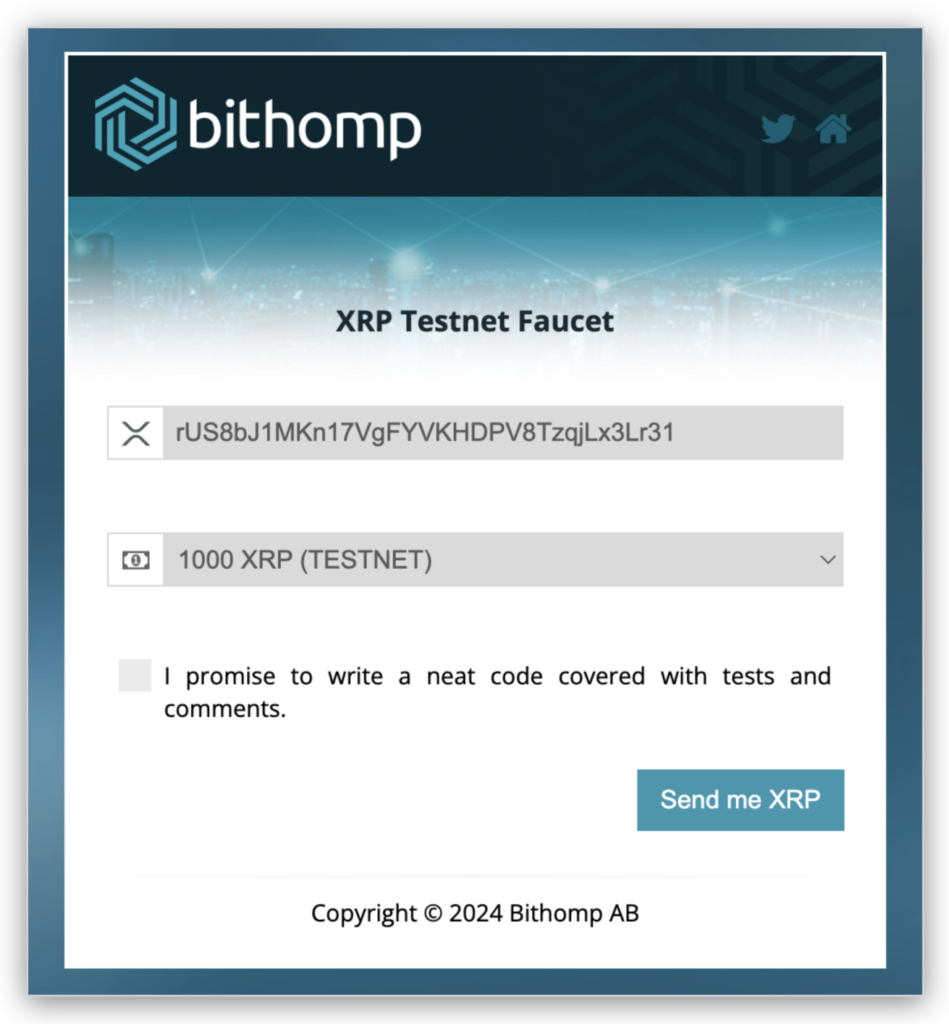
- It’s time to source the testXRP and CFLR tokens you need to mint your first FAssets on the Coston network. As with most tokens on test networks, they are available for free and have no monetary value. Let’s head to the demo dapp and click the link to the testXRP faucet. Alternatively you can go directly there using this link.
- Paste your XRP address into the box, tick the check box and press ‘Send me XRP’, and soon you’ll have 1000 testXRP in your Bifrost Wallet.
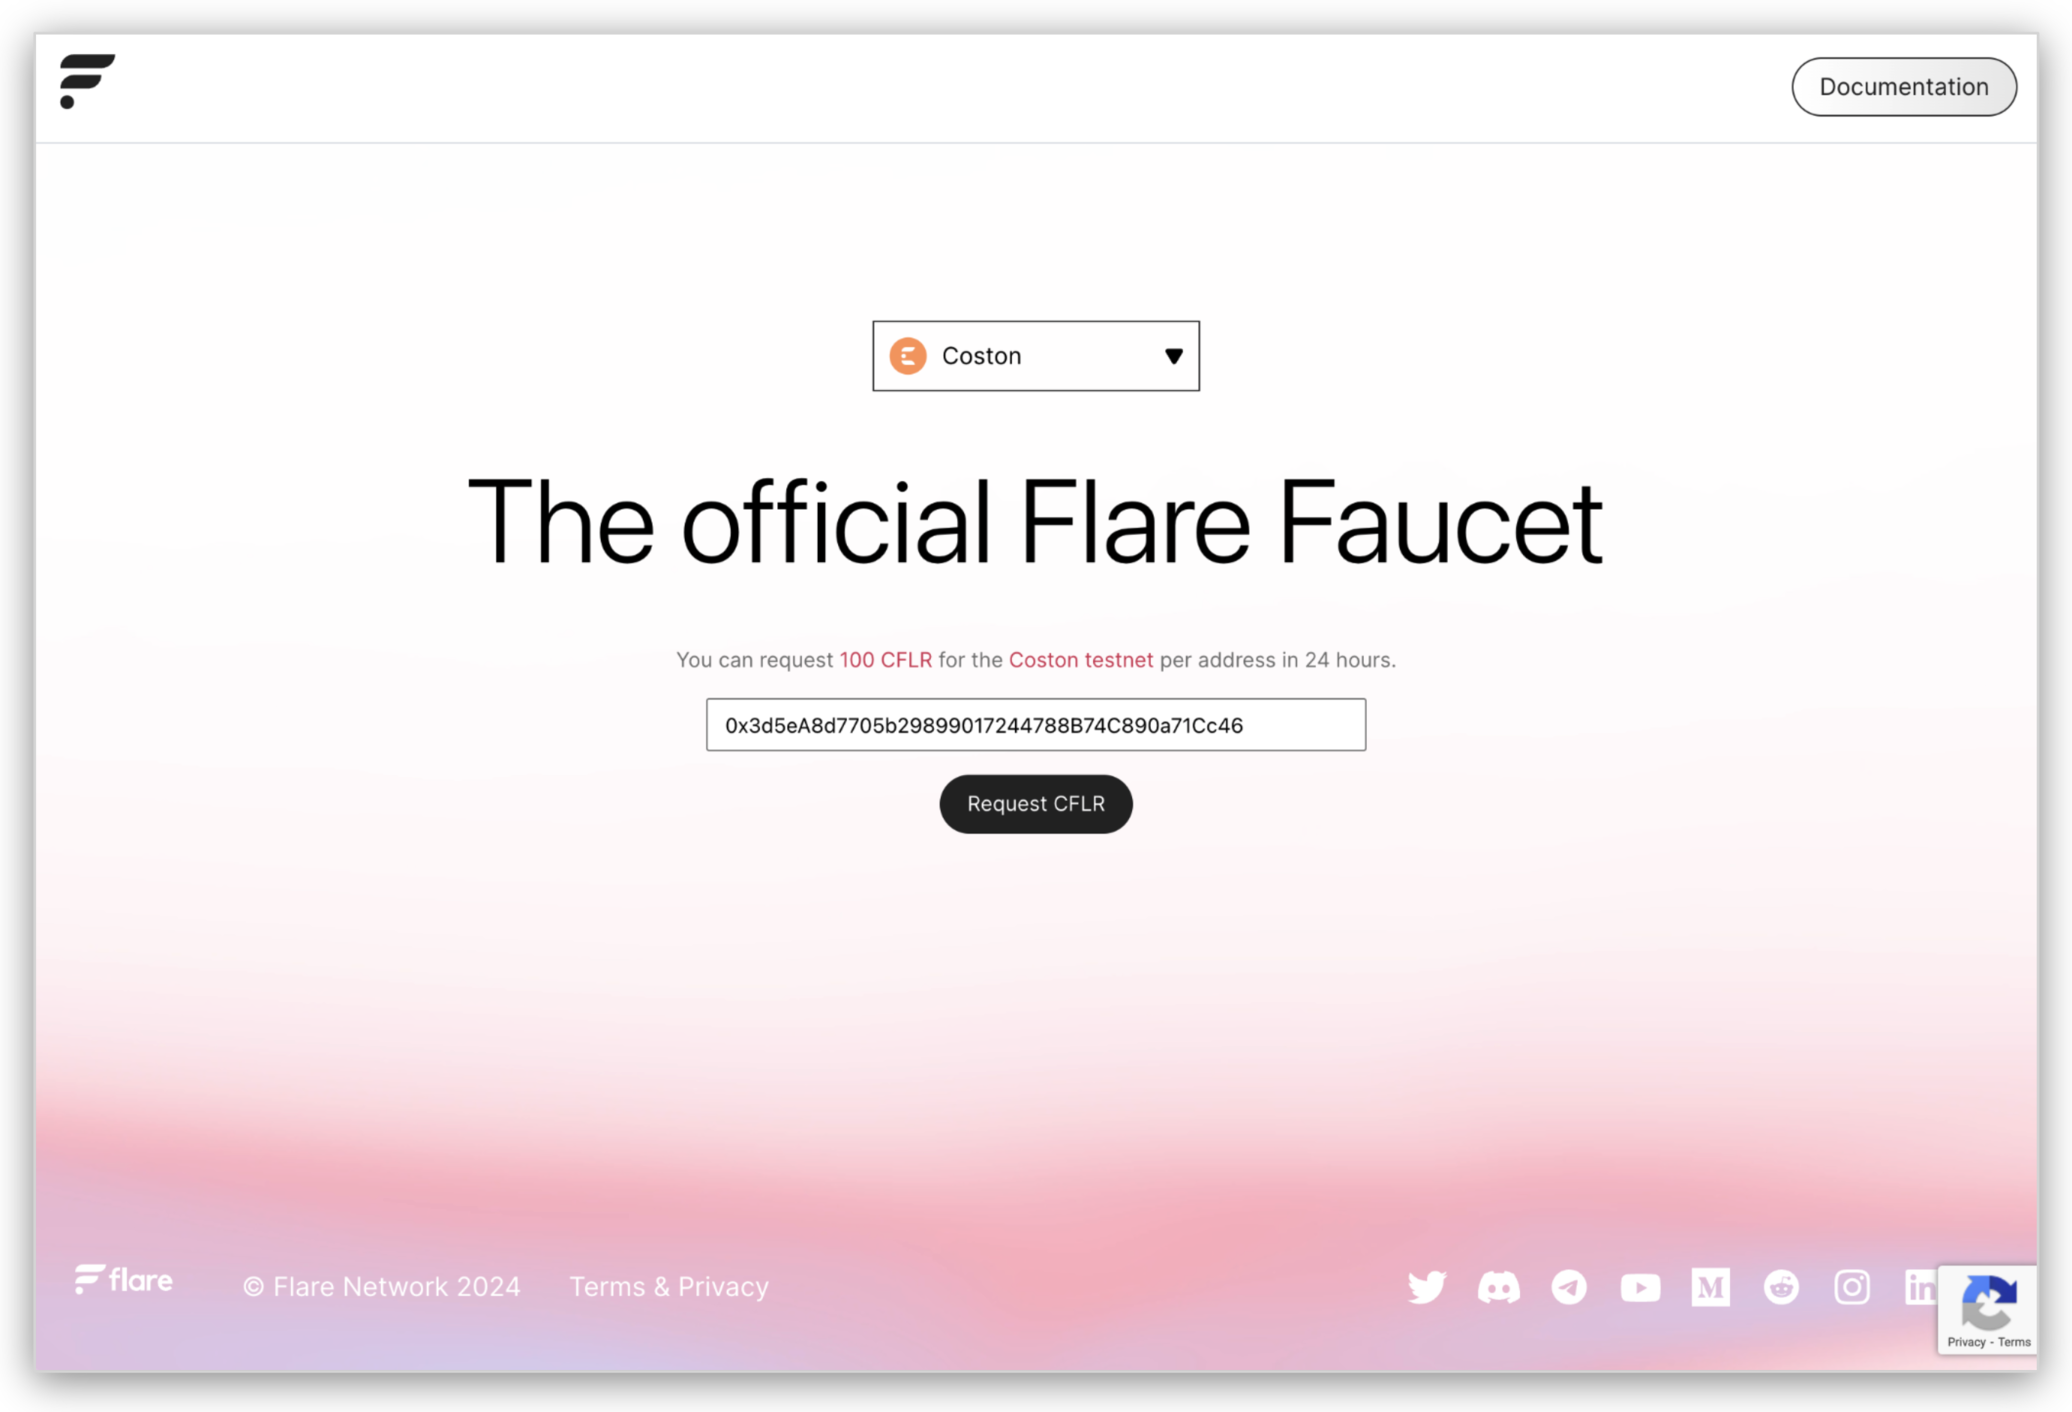
- Now let’s go to the Coston Flare faucet and repeat the process. This time enter the Coston address you recorded earlier into the box and press ‘Request CFLR’.
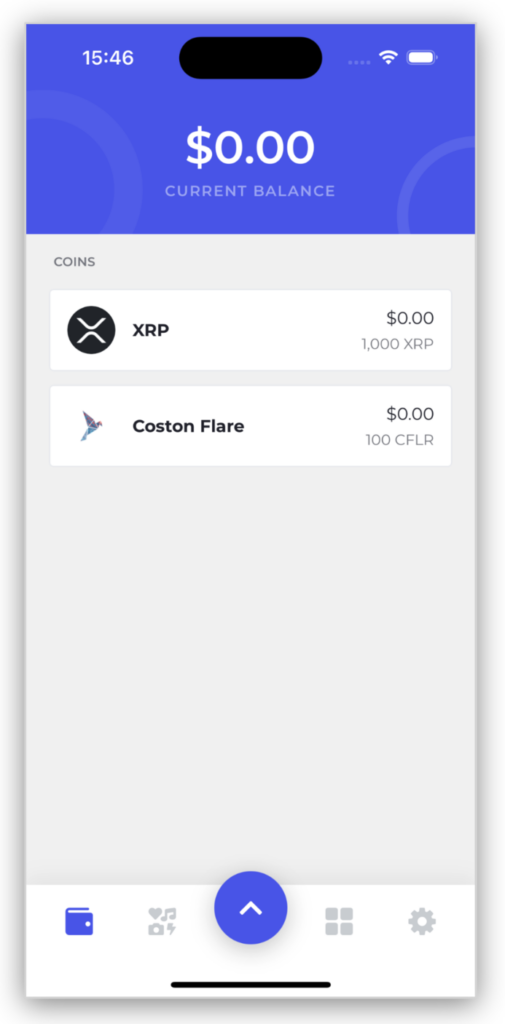
- Head back to Bifrost Wallet, click the wallet icon at the left of the navigation bar and you should now be the proud owner of 1,000 testXRP and 100 CFLR.
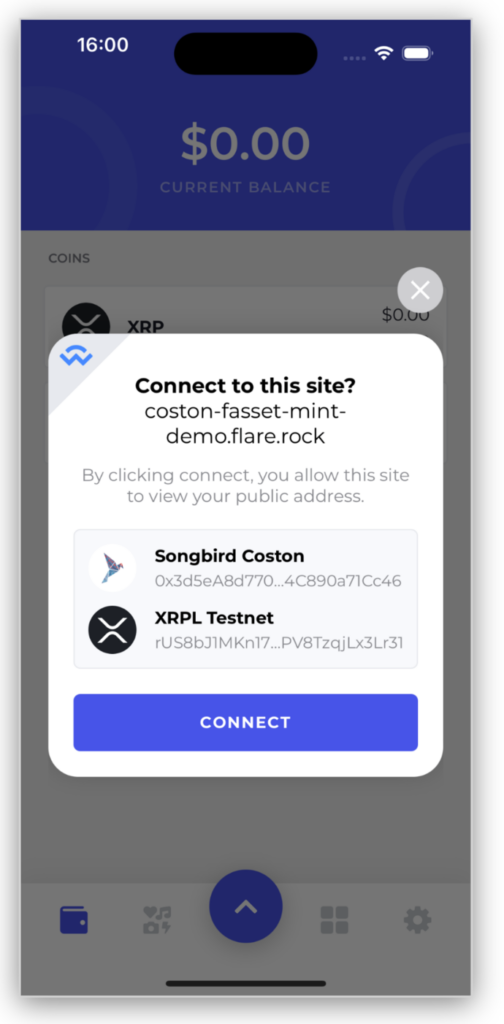
- It’s time to mint some FAssets. The next step is to connect your Bifrost Wallet to the demo dapp using Wallet Connect. Head back to the demo dapp, click the button ‘Connect Bifrost Wallet’ and then hit the ‘Wallet Connect’ button. It will display a QR code on your screen. In Bifrost Wallet click the central blue arrow in the navigation and select ‘Connect’ to activate the camera.

- Line up the QR code in the frame until it is detected. Bifrost Wallet will then ask if you want to connect to this site, while showing you that it will connect both your testXRP address and your CFLR address, simultaneously. This makes the whole process much easier than needing to use separate wallets for each. Press ‘CONNECT’.
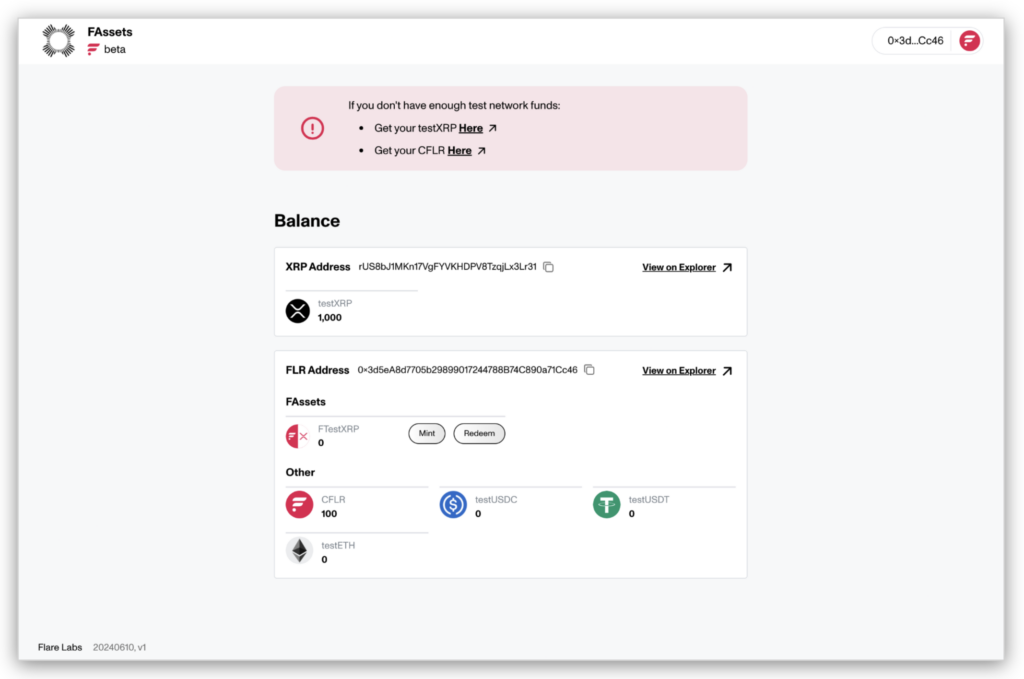
- The dapp will now be connected to your Bifrost Wallet and will update to show your balances of testXRP and CFLR. Let’s mint FTestXRP. Press the ‘Mint’ button.
- Select how many lots of FTestXRP you want to mint. With your 1000 testXRP you could mint up to 50 lots in one go, but since this is a beta test, we’d be grateful if you broke this amount up into multiple transactions over several days to help test the system. Did someone say “retroactive airdrop”?
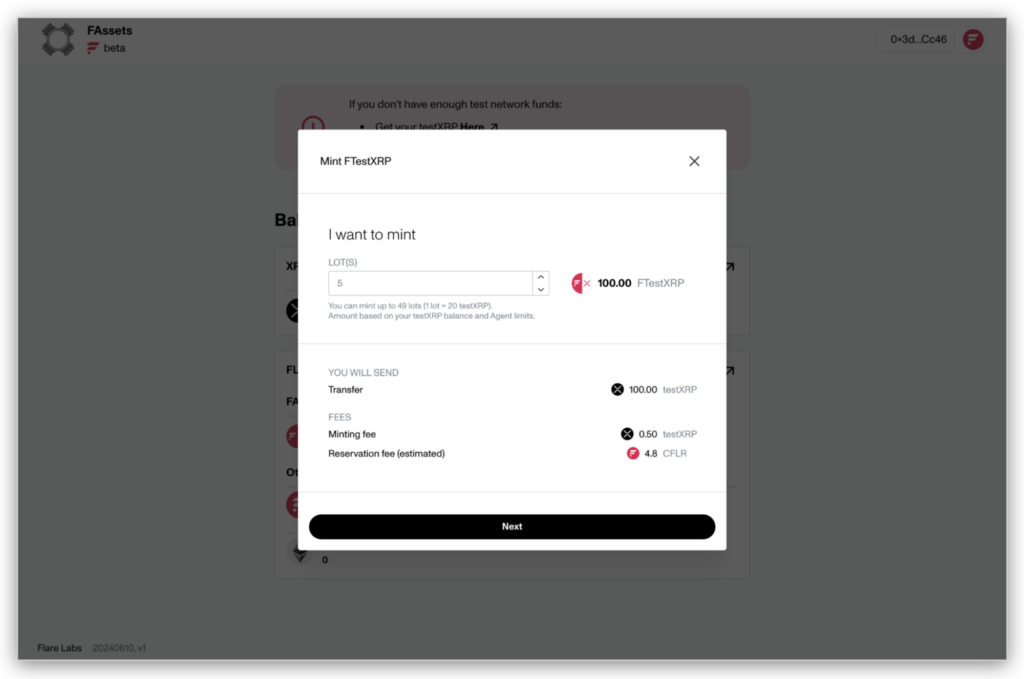
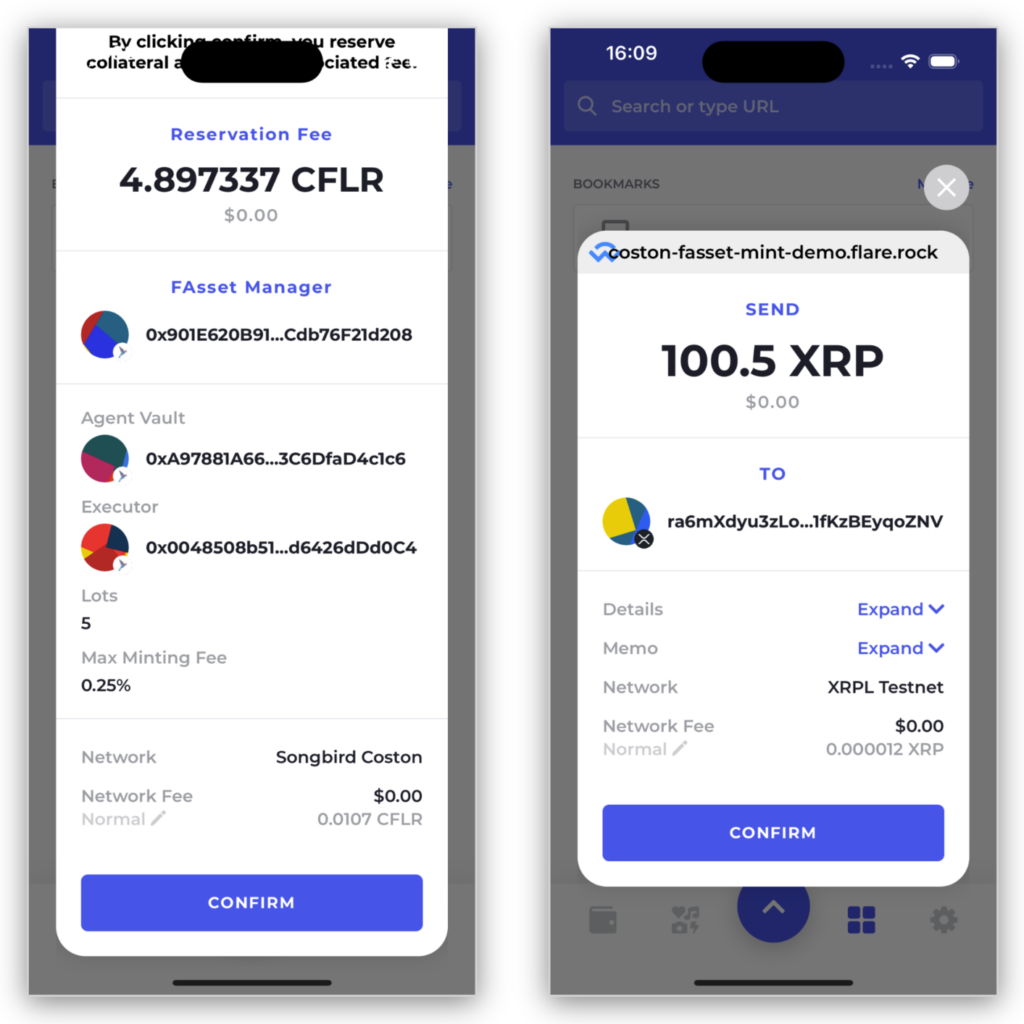
- Press ‘Next’ and the minting process will begin. First you will need to confirm a collateral reservation transaction in Bifrost Wallet, setting the mint amount and the fees. Press ‘CONFIRM’ (and input your PIN or biometrics) to send the CFLR to the FAssets contract. Now the collateral has been reserved, the system will ask you to confirm you are happy to send your XRP to the agent. Press ‘CONFIRM’ again (and enter your PIN or biometrics) to approve the transaction.
- Behind the scenes the Data Connector is now trustlessly proving that you have sent the right amount of testXRP to the correct address with the correct reference. It takes approximately 5 minutes for the Data Connector to come to consensus and provide the FAssets system with a proof that this has occurred. The screen will update through four stages as processing of the mint is completed.
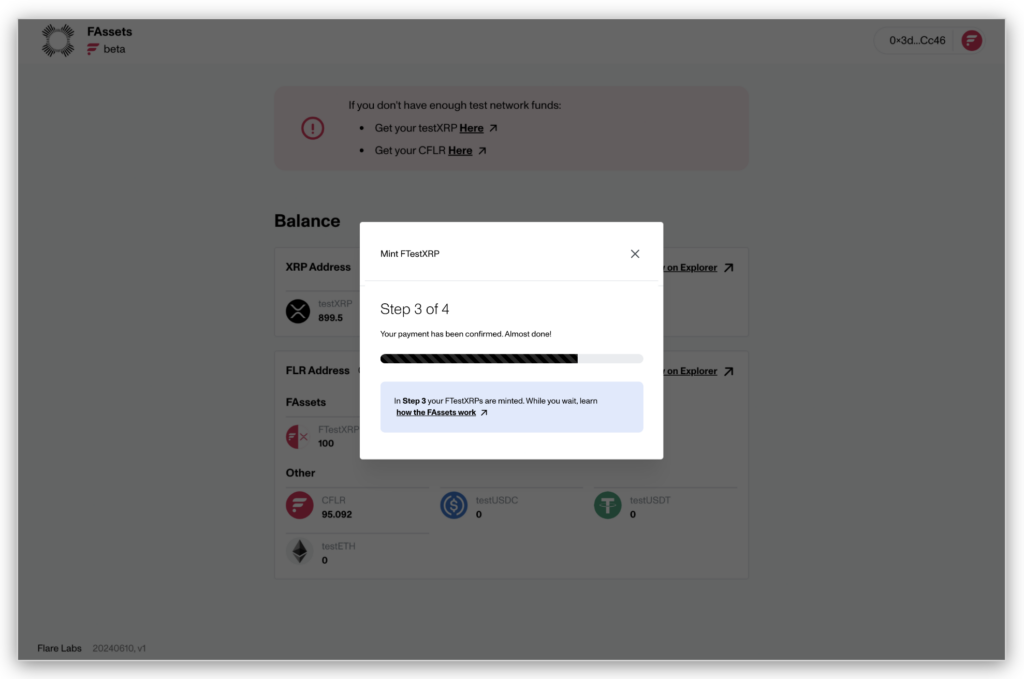
- When this proof is received, the FTestXRP will be minted and very shortly be visible in Bifrost Wallet. Congratulations, you have minted your first FTestXRP on the Coston test network.

- You can follow a similar process to redeem your FTestXRP and receive your original testXRP back in your wallet. During this open beta phase, if you run out of testXRP or Coston Flare, you can always head back to the faucets to get some more. You can obtain a maximum of 1000 testXRP and 100 CLR per day.
- FTestXRP is a normal token on the Coston network, so you can send or receive it. Just remember you will need a small amount of CFLR for gas.
- If you have any feedback on the process or encounter any challenges, please reach out to us in the Flare Telegram channel. This is a beta phase of the launch, so the more information we have, the better we can make the final product.
- Thank you for playing ☀️.